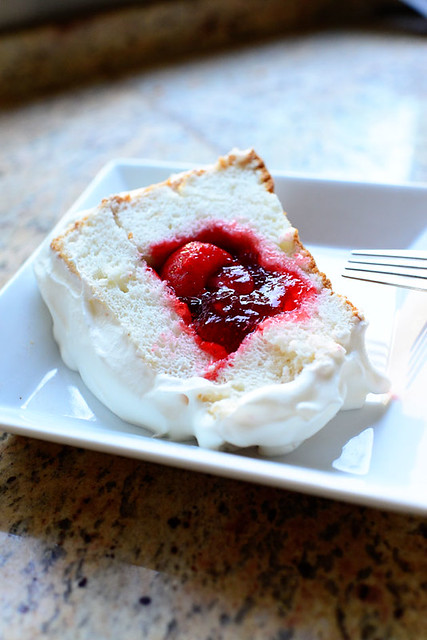
 Get ready to have some fun!
I made this cake yesterday for the first time, after having flirted with it for weeks. My father-in-law had brought it to my attention after noticing it in a collection of his great grandmother’s recipes, and when my father-in-law brings a recipe to my attention, it’s the same as him saying “Will you make this for me sometime?” My father-in-law loves sweets, you see, and he also knows that I have a soft spot where he’s concerned. Delivering him sweets is one of my favorite things to do.
Different versions of Strawberry Sparkle Cake exist throughout the land, and I actually wound up changing this one a bit when I made a trial run of it yesterday. It turned out really delicious, and I’ll be whipping one up on the Fourth, too. That’ll give me a chance to give my father-in-law a piece…and if he likes it, I’ll make him another one the next morning so he can eat it for breakfast. Then I’ll make him another one the next day so he can eat it for dessert.
I repeat: I have a soft spot where he’s concerned.
No matter what precise version of Sparkle Cake you wind up making, it always begins with a good angel food cake. You can use a storebought on or make one from a mix…but if you make your own angel food cake, you’ll feel like you can do most things in life.
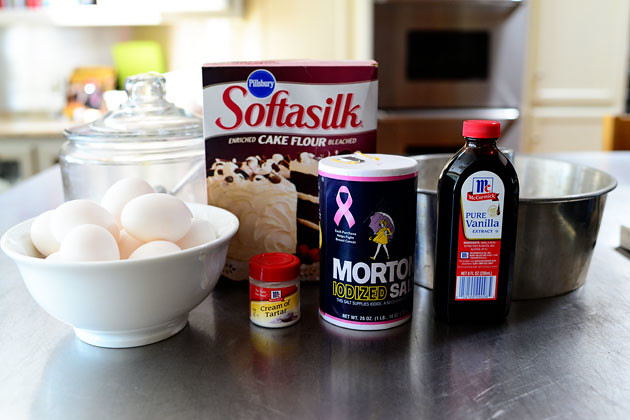 To make the angel food cake, you need egg whites, cake flour, sugar, cream of tartar, salt, and vanilla. Simple stuff, Maynard!
Sorry I called you Maynard.
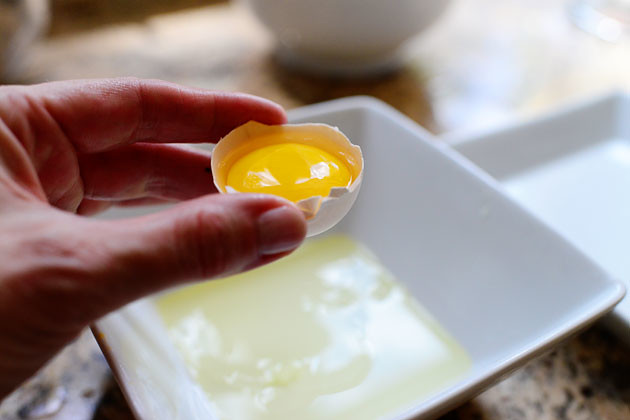 Now, one of the most important things is that eggs need to be room temperature, so set them out a good hour or two before you need them. Then separate them one by one…
 Until you have a whole buncha whites. I’ve made this cake using everywhere from 10 to 15 egg whites, and 15 has turned out to be the best number.
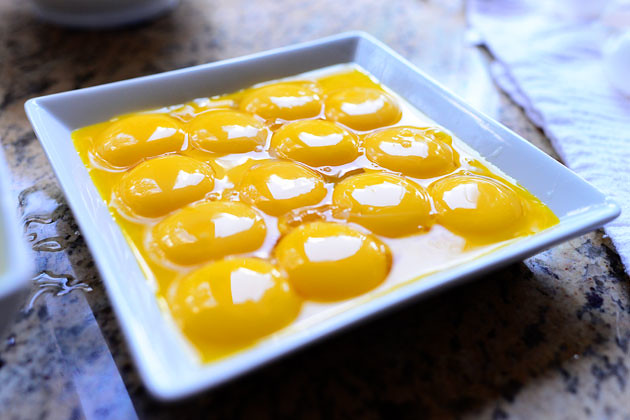 Oh, and don’t let these beauties go to waste! Whip up Cinnamon Baked French Toast using only yolks. Ta die fer.
Or make Crème Brûlée. Oh, yes.
Or Vanilla Bean Ice Cream would do just fine, too.
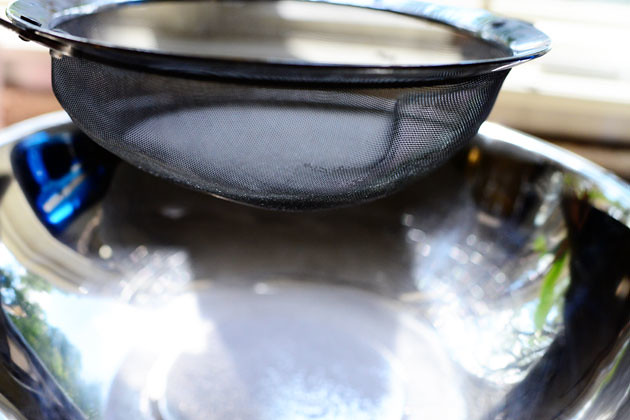 Then, before you start whipping the whites, sift the sugar three times.
 Everything with angel food cake has to be light and not clunky…so sifting is the name of the game.
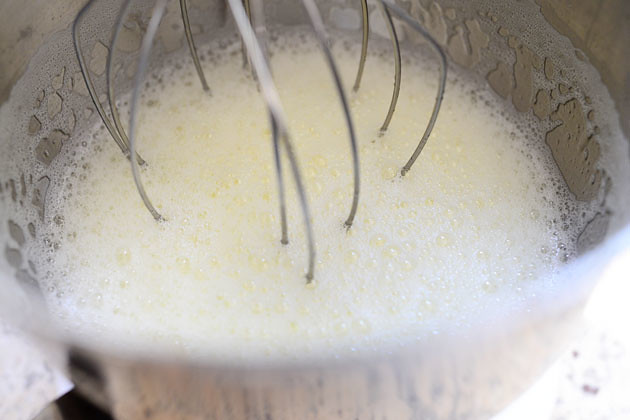 Now, pour the whites into a mixer and whip them on high until they’re frothy. This basically means they’re bubbly and foamy…but still quite liquidy.
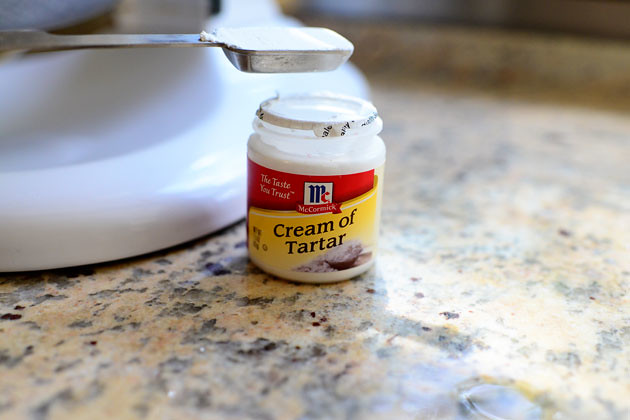 At that point, turn off the mixer and measure 1 teaspoon of cream of tartar…
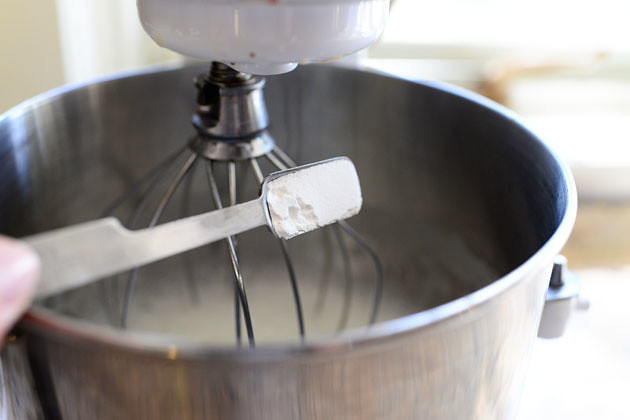 And add it to the bowl.
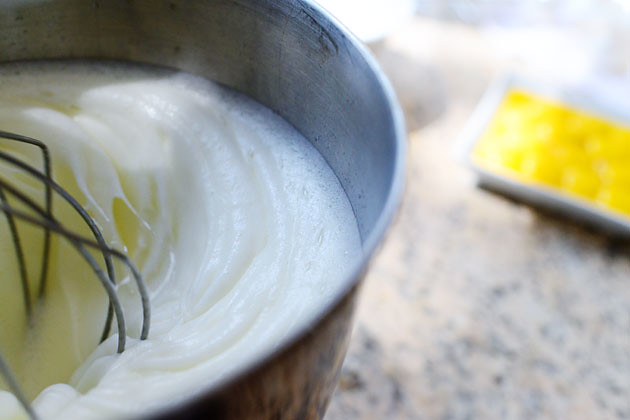 Then turn the mixer to high again and beat the heck out of the whites…
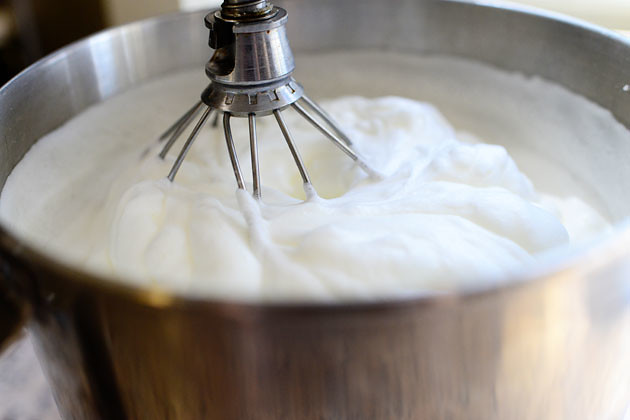 Until they’re light and fluffy and stiff. Like a cloud!
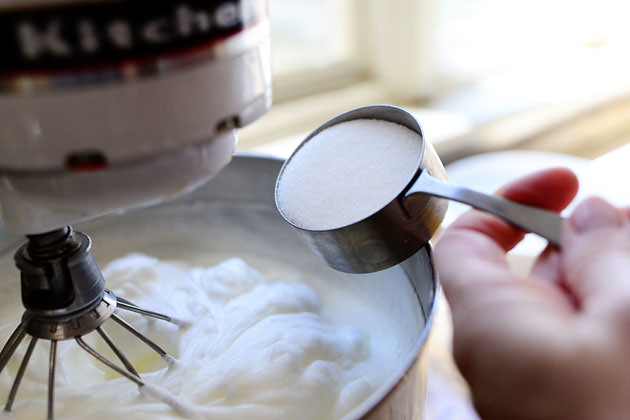 Now, turn the mixer to low and very slowly sprinkle in the sugar so that it’s really gently and gradually incorporated.
 After the sugar’s mixed in, the whites take on a slightly different appearance (gorgeous!) but the volume should be pretty unaffected.
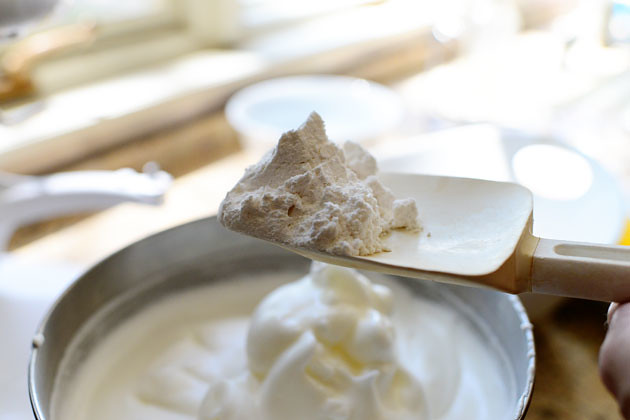
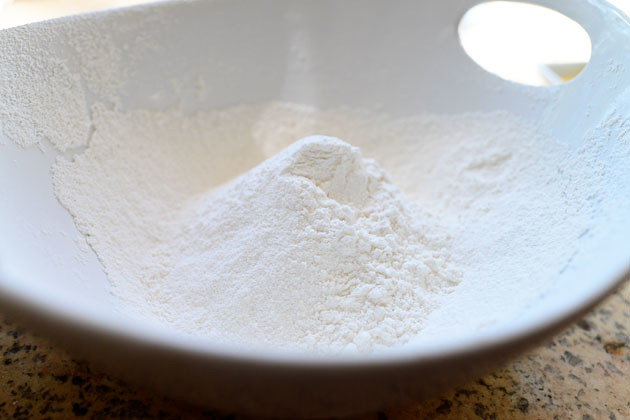 Next up, sift together the cake flour (essential!) and the salt five times! Not four times. Not six times. Five times.
Did I mention five times?
 Then remove the bowl from the mixer and add the flour mixture a spoonful at a time…
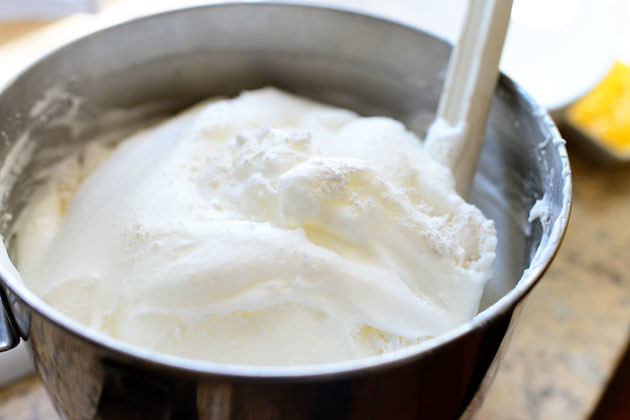 Very gently folding it in.
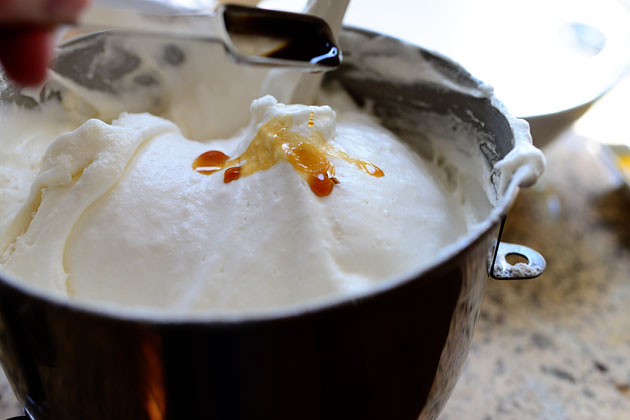 After the flour is mixed in, sprinkle on a little vanilla and mix that in, too.
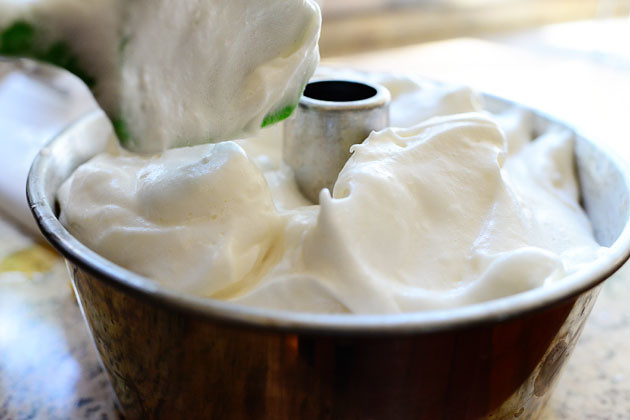 Plop the batter right into the angel food (also known as tube) pan.
Important: Make sure the pan is absolutely, positively clean and free of any oil, butter, grease, suntan lotion, and WD-40. Any hint of grease on the pan will cause massive problemas for the cake!
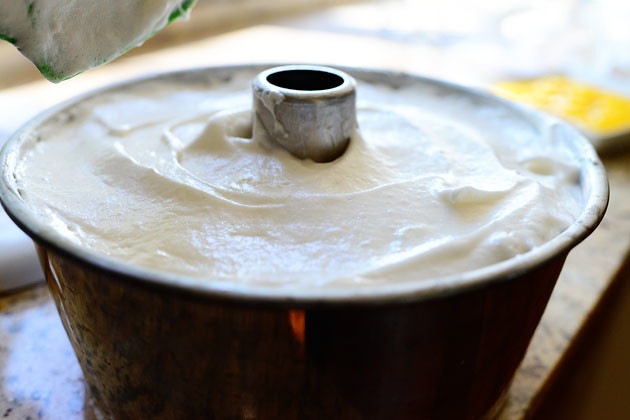 Smooth out the top of the cake and bake it in a 350 degree oven for about 40 minutes. You can stick a wooden skewer in the cake to test it; it should come out completely clean.
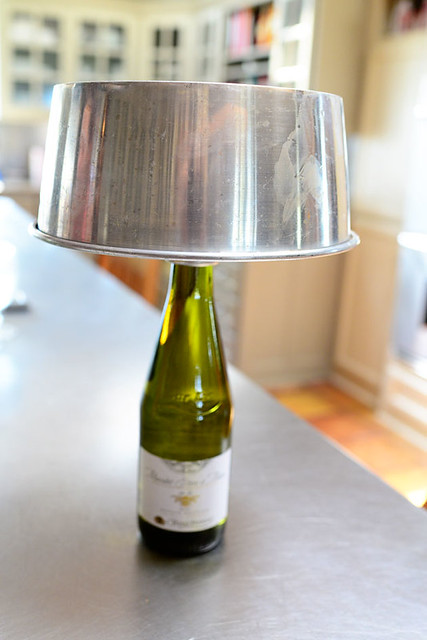 Then, the very second you remove it from the oven, invert the pan on a wine or vinegar bottle and let it cool completely upside down.
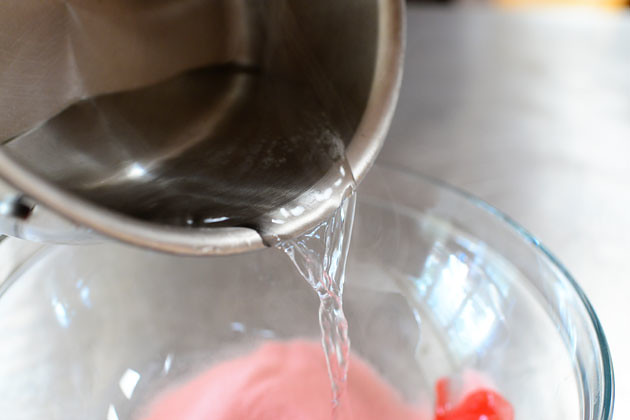
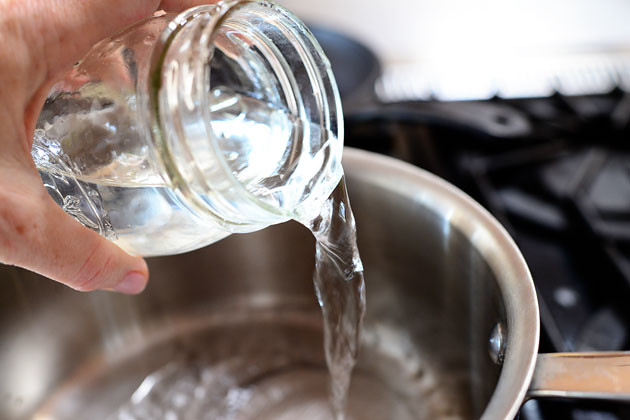 While the cake is cooling, make the filling! Pour 2 1/2 cups of water in a saucepan and bring it to a boil.
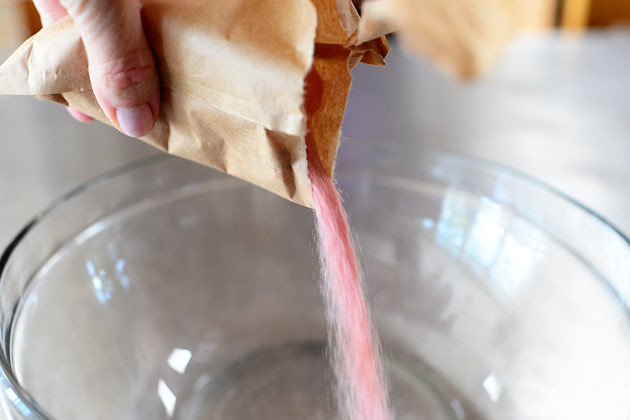 Then add a 3-ounce package of strawberry jello to a bowl.
(This is a larger package; I just used half.)
 Then pour the boiling water over the powder…
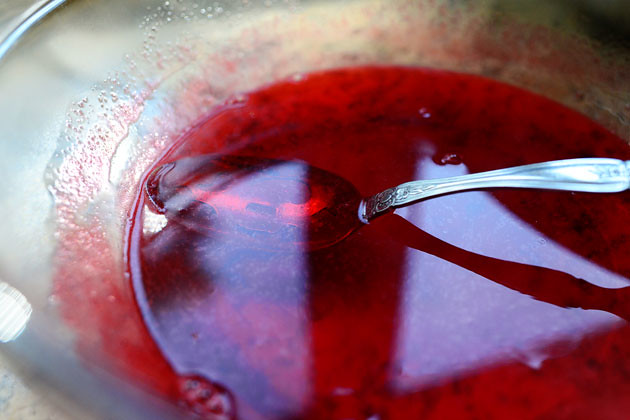 And stir it together to dissolve.
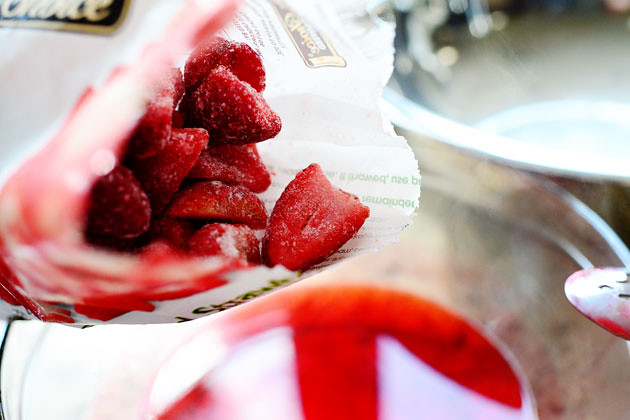 Next, grab a bag of frozen strawberries…
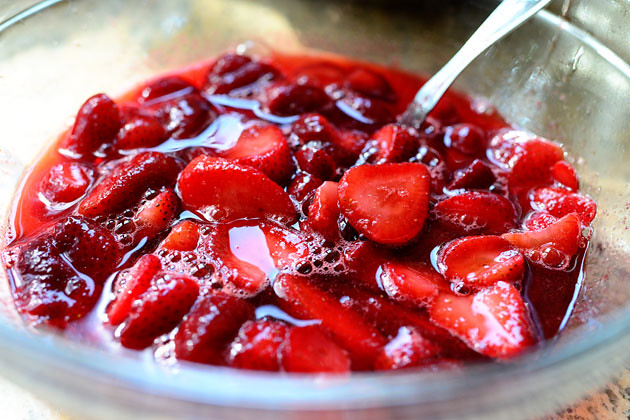 And pour them right into the liquid.
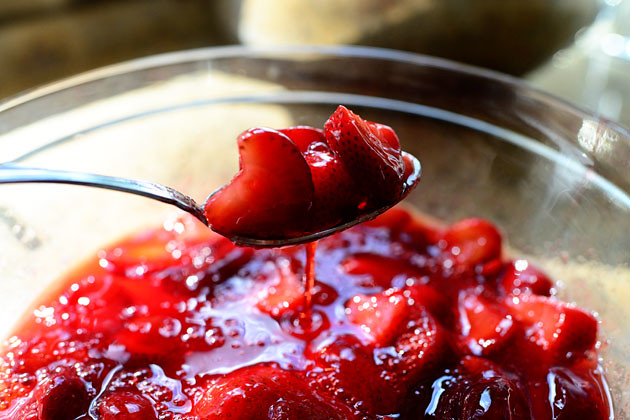 Stir them around for a minute or so. Adding the cold strawberries to the hot jello is akin to adding the cold water: as you stir the strawberries, the liquid will start to thicken. Ultimately, you want a sort of thick (but still pourable) jello consistency. Set this aside a bit, and note that it will continue to thicken as it sits.
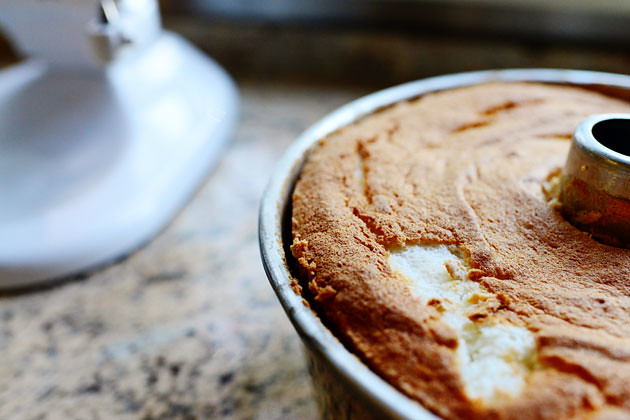 Once the cake is totally, completely cooled (should take at least an hour; don’t rush it!) use a small, sharp knife to carefully loosen the cake from the pan.
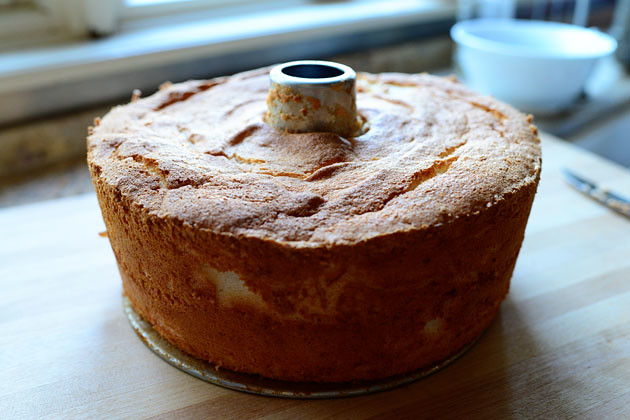 Take it out of the pan…
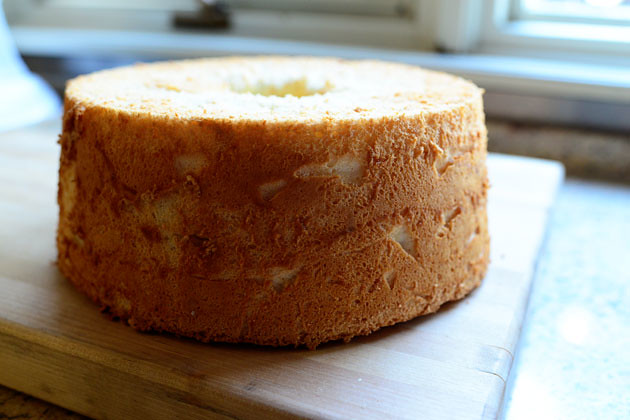 Then remove it from the bottom piece and turn the cake upside down.
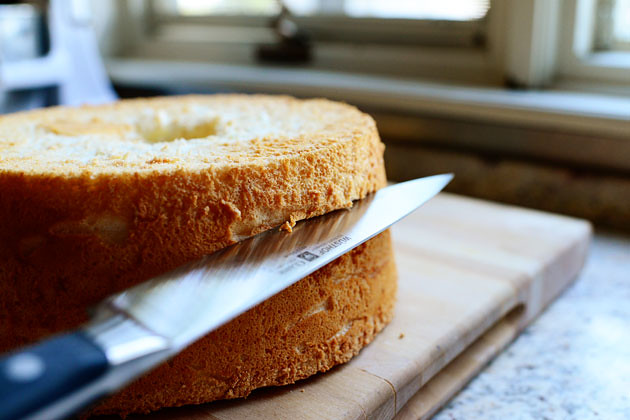 Next, use a sharp knife to cut a slice 1-inch from the top.
 Cut all the way around until it’s cut all the way through, then remove the top piece, laying it next to the cake.
 Now, with a small sharp knife, cut a circle 1-inch from the outer edge of the cake, making sure not to cut all the way to the bottom (leave at least an inch of cake at the bottom). Can you see the cut?
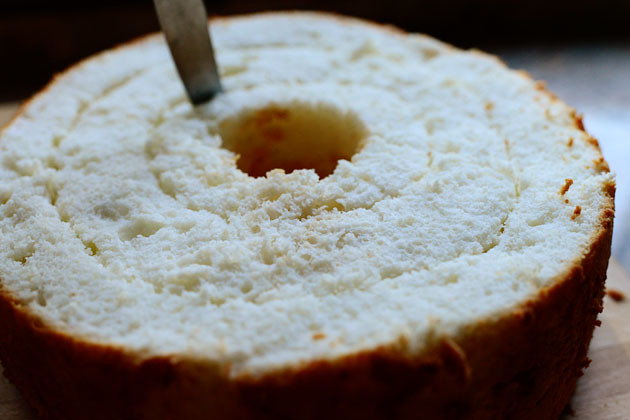 Make another cut 1-inch from the inner edge of the cake. You now have two concentric circles cut into the cake.
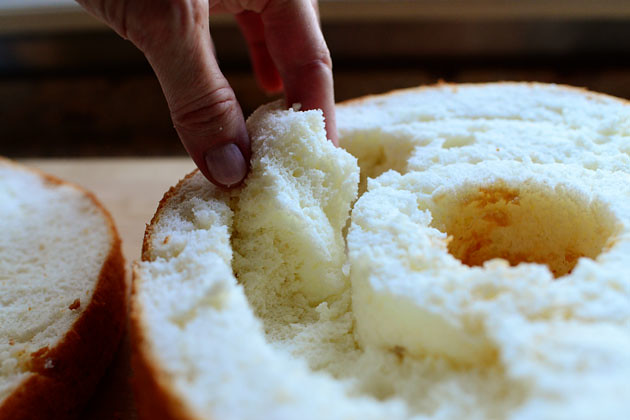 Next, carefully remove the cake between the two circles, creating a “trench” throughout the center of the cake.
 As you tear out the cake, try to keep the bottom of the trench at generally the same level. You don’t have to be perfectly precise, but try to be as uniform as possible.
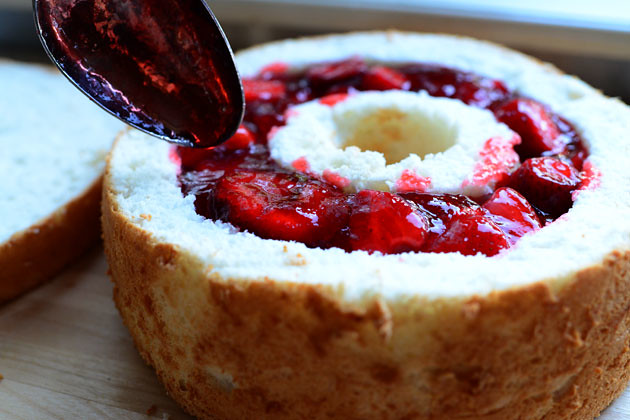 Next—you guessed it!—spoon the strawberry filling right into the trench. Note that you probably won’t have the space to use every last drop of the strawberry mixture…but just keep filling until it’s just barely above the level of the cake (to allow for a little settling.)
If you have extra strawberry stuff, spoon it over ice cream!
And that’s an order.
(Note that the original recipe called for stirring the angel food chunks into the strawberry mixture…but I didn’t really like the sound of that so I decided to leave them out.)
 Next, place the cake “lid” right back on the top, making sure to match up the cut so that it sits just right.
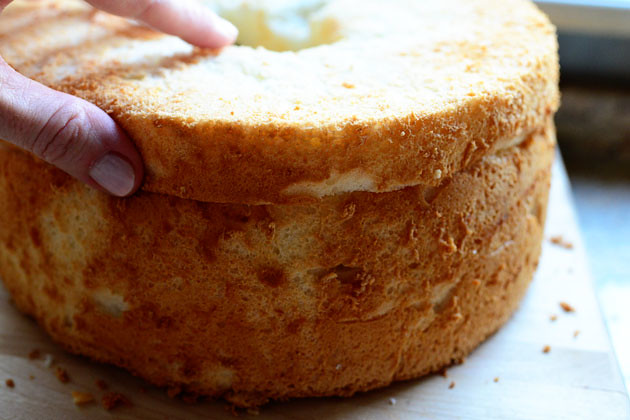 Score. A direct hit.
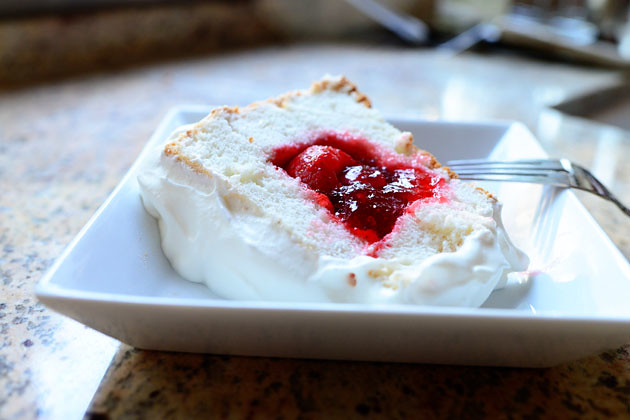
Now, at this point you can refrigerate the cake for a couple of hours and ice it later…or you can ice it first, then refrigerate it. Either way, it’s best to chill it for at least a couple of hours before you serve it just to make sure it’s all set up. When it’s ready, the jello will be set and should stay put once you cut into the cake.
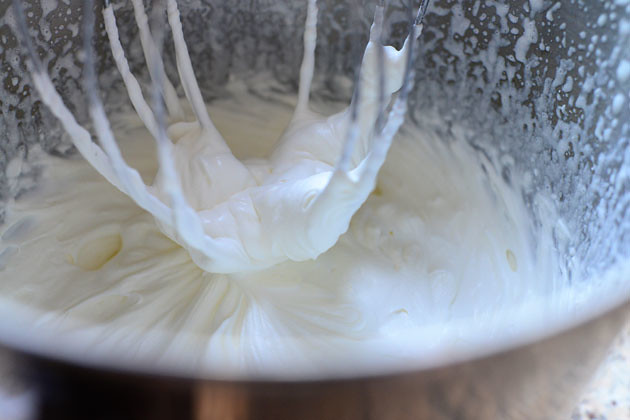 The icing is nothing but heavy cream and sugar whipped together.
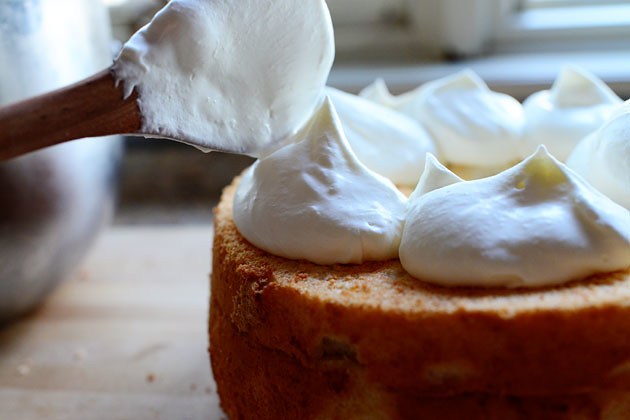 Just plop the cream over the top…
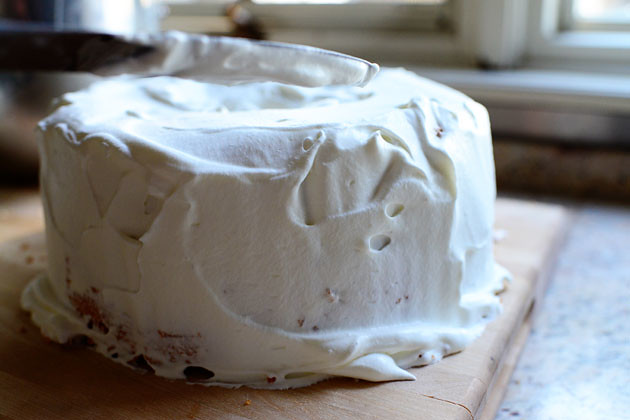 And schmear it all over the cake!
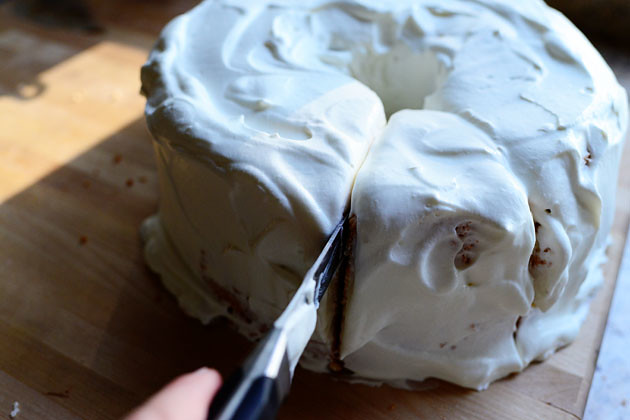 I went ahead and sliced into it because I couldn’t wait to give it a try…but don’t be like me. Be sure to chill it first.
And you can decorate the top with strawberry slices, of course!
 Hello, beautiful!I’m so glad to have you in my life.
I probably don’t need to tell you how many different things you could do with this basic method. I was actually tempted to whip the topping with cream so that the filling would be more of a whipped pink concoction. But you could also just do whipped cream and berries in the middle. Or you could change it up and do peaches. So many combinations!
A fun cake for the Fourth—give it a try!
Love,
P-Widdy
P-Widdy
Recipe
Strawberry Sparkle Cake
- Prep Time:
- Cook Time:
- Difficulty:
- Intermediate
- Servings:
- 12

Ingredients
- Angle Food Cake
- 15 whole Egg Whites, At Room Temperature
- 1 teaspoon Cream Of Tartar
- 1-1/2 cup Plus 2 Tablespoons Sugar, Sifted Three Times
- 1 cup Cake Flour
- 1/4 teaspoon Salt
- 1 teaspoon Vanilla
- Filling
- 1 package (3 Oz.) Strawberry Jello
- 2-1/2 cups Boiling Water
- 1 package (1 Pound) Frozen Sliced Strawberries
- Icing
- 1-1/2 cup Heavy Cream
- 2 Tablespoons Sugar
Preparation Instructions
Preheat oven to 350 degrees.
Combine cake flour and salt and sift together five times. Set aside.
Beat egg whites until frothy (lots of bubbles but still liquidy and loose.) Add cream of tartar and beat on high until stiff.
With mixer on medium-low, slowly sprinkle in sifted sugar as it mixes in.
Remove bowl from mixer and fold in sifted flour gently until it's all combine. Sprinkle vanilla into the bowl and fold gently.
Spoon batter into tube pan---make sure there's no grease or butter in there! Smooth the top and bake for 35-45 minutes, or until a wooden skewer stuck all the way to the bottom comes out clean. (Don't open the oven while it's baking!)
Carefully remove the cake from the oven and immediately invert it on a wine or vinegar bottle. Let it cool completely while hanging upside down. Once totally cool, remove it from the pan.
To make the filling, sprinkle the jello powder into a bowl and pour in 2 1/2 cups of boiling water. Stir to dissolve, then add the bag of frozen sliced strawberries. Stir to cool the mixture and set it aside.
Turn the cake upside down so that the end that was stuck to the bottom of the pan is now facing up. With a serrated knife, carefully cut the top 1-inch of cake from the top. Remove it and lay it beside the cake. Next, with a small paring knife, make two concentric cuts in the cake: one cut is 1 inch from the outside rim, the other cut is 1 inch from the inside rim. (Be careful not to cut all the way through to the bottom of the cake! Leave about an inch from the bottom.)
Tear out a trench in between the two cuts and save the torn cake pieces for another use.
By now, the strawberry mixture should be cool and somewhat gelatinous. IMPORTANT: If mixture is not thick, stick it in the freezer for 15 minutes or until it thickens and sets. Carefully spoon the mixture into the trench in the cake, filling it all the way to the top and ever-so-slightly above to allow for a little settling. Place the top of the cake back on top, lining it up just right.
Refrigerate cake for a couple of hours (or you can stick it in the freezer for an hour or so if you're in a hurry!)
To serve, whip together the cream and sugar until stiff. Spread all over the cake. Cut into slices and serve! Note that once you make a cut, the filling will slightly seep out of the remaining cake, but not overly so.
This is a fun, festive, fresh, fabulous cake!


0 comments:
Post a Comment