Tuesday 20 May 2014

Blueberry Yogurt Crêpes

0 comments


Pin It
This summer I’ve been working on helping my kids understand, so they will appreciate, the value of eating ripe, seasonal, and local produce and foods. To explain this to them with words is one thing but I have found it more effective (and fun) for them to experience the pleasure of eating a perfect strawberry or peach in season where the fruit’s juices drip from their chins and stain their finger tips.
Earlier this week I took my kids blueberry picking at a local farm. We came home with buckets filled with sweet dark blueberries picked off the bushes ready to be used for making jam, pies, sauces, and other delectable foods.
Pin It
One of my most favorite breakfast recipes using blueberries is a filled crêpe. Instead of filling each crêpe with whipped cream, I love to fill them with Greek yogurt for its thick creaminess and finishing them off with a light layer of homemade blueberry sauce.
Pin It
Pin It
Pin ItTopped off with a dusting of powdered sugar and a small dollop of blueberry sauce, these crêpes are perfect for breakfast or brunch and could easily be served for dessert. If you have a blueberry farm nearby, perhaps this recipe is the inspiration you need to pick your own. Enjoy!
Pin It

99

Recipe: Easy Blueberry Yogurt Crepes

  • Prep Time: 5 min(s)
  •  
  • Cook Time: 10 min(s)
  •  
  • Servings: 8
A great crepe breakfast recipe for the family.

Ingredients

  • 1 1/3 cups milk
  • 3/4 cup all-purpose flour
  • 2 large eggs
  • 2 tablespoons honey
  • 1 tablespoon lemon zest
  • 1 teaspoon vanilla extract
  • 2 tablespoon butter, melted
  • 1 1/2 cup blueberries
  • ¼ cup honey
  • ¼ cup orange juice
  • 2 2/3 cups vanilla flavored Greek Yogurt
  • 1/4 cup powdered sugar

Instructions

  1. Blend milk, flour, eggs, honey, zest, and vanilla extract in a food processor, blender, or whisk by hand until smooth.
  2. Heat an 8-inch non-stick skillet on medium heat. Brush a generous coat of melted butter over the bottom and sides of the pan.
  3. Pour ¼ cup of batter into the center of the pan, twirling it so the batter spreads evenly. Cook for 30 seconds until crêpes pull away from the sides of the pan. Gently flip the crêpe over with a rubber spatula and cook for an additional 5 seconds. Remove from heat and transfer to a plate. Repeat cooking the crêpes until all the batter has been used. Set the cooked crêpes aside.
  4. Rinse and clean the same pan. Heat the blueberries, honey, and orange juice on medium high heat.
  5. Cook the blueberries for 3 minutes, stirring occasionally. Turn off the heat.
  6. To assemble and fill the crêpes, scoop 1/3 cup of yogurt from its container and place it in the center of the crêpe from side to side.
  7. Spoon a generous tablespoon of blueberry sauce over the yogurt.
  8. Tuck the side ends over the yogurt about 1-inch in. Fold the opposite sides over each other to form a wrap.
  9. Finish each crêpe off with a dusting of powdered sugar and a small spoonful of blueberry sauce.

Breakfast Burritos

0 comments

This week my family and I have been vacationing on the Washington Coast, experiencing the last few days of summer break before the kids start school on Monday. Together as a family, we experienced camping for the first time in a rental RV. Boy, what an adventure it has been! What started out as a chaotic first day just trying to get out of town turned out to be a very enjoyable stay once we settled in at Cape Disappointment State Park. We’re headed back home today.
With the crisp, cold ocean air infused with the comforting scent of burning camp fires all around us, the weather is definitely transitioning into a Northwest type of fall. Being the one in charge of food, I’ve enjoyed cooking in the small kitchen, especially preparing a warm breakfast dish each morning.
The first morning of our RV adventure, I made our family easy breakfast burritos which can be done in fifteen minutes. What I like about this recipe is how easily it can be adapted to your individual taste. If you prefer a vegetarian version, omit the chicken sausage and add more vegetables. Sensitive to dairy? Leave the cheese out. Gluten allergy? Use a corn tortilla instead. Use what works best for you.
If you’re in too big of a hurry on weekday mornings, then save this recipe for the weekend. Served with jarred salsa, this recipe is a great one to add to your family’s repertoire.
Pin It
33

Recipe: Breakfast Burritos

  • Prep Time: 10 min(s)
  •  
  • Cook Time: 5 min(s)
Served with jarred salsa, this breakfast burrito is a great recipe to add to your family's breakfast repertoire.

Ingredients

  • ½ medium yellow onion, diced in small pieces
  • ½ green bell pepper, diced in small pieces
  • 1 chicken sausage, diced in small pieces
  • 4 eggs, beaten
  • Salt and pepper
  • 4 10-inch flour tortillas
  • 6 tablespoons shredded cheese
  • salsa

Instructions

  1. Heat a non-stick skillet on medium high heat and coat with non-stick spray.
  2. Sauté the onion, bell pepper, and sausage for 5 minutes until the onions are soft and translucent.
  3. Turn down the heat to medium and add the eggs.
  4. Using a wooden spoon, gently stir the eggs occasionally from the outer edge towards the center until the eggs are cooked yet slightly wet. Season with salt and pepper to taste. Turn off the heat. Transfer the egg mixture to a plate.
  5. Carefully but quickly, rinse, clean, and dry the pan and return to the burner.
  6. Lay the tortillas on a cutting board.
  7. Evenly divide the cheese among the four tortillas and sprinkle the cheese down the center of each one.
  8. Evenly divide the egg mixture among the tortillas and spoon the eggs down the center of each tortilla on top of the cheese.
  9. Fold the top and bottom edge approximately one inch of each tortilla down/up towards the center.
  10. Starting from the left side and moving to the right, roll the tortilla tightly to form the burrito.
  11. Heat the skillet on medium heat and coat with non-stick spray.
  12. Carefully lift each breakfast burrito and place it in the pan with the edge side down.
  13. Cook for approximately 20-30 seconds until the tortilla is crispy and golden brown. Flip the burrito and do the same on the other side.
  14. Serve the burritos immediately with a side of salsa.

Classic Apple Tart

0 comments


Recently I gave my kids a mini lesson in economics. When we were travelling in Utah last month for our summer vacation, a typical lunch for the four of us in a restaurant cost close to $50. One day we stopped at a market and bought the makings of a humble lunch – bread, peanut butter, bananas, tortilla chips, and nectarines – which we ate outside at a picnic table. The food stretched for more than one meal yet we spent less than $20 for all of it.  I wanted the kids to understand what an indulgence it is to eat in restaurants and how it can easily cost at least double if not more to do so.

Recipe: Classic Apple Tart

  • Prep Time: 40 min(s)
  •  
  • Cook Time: 60 min(s)
Reprinted with permission from the book Ten Dollar Dinners. Copyright © 2012 by Melissa d’Arabian. Published by Clarkson Potter, a division of Random House, Inc.

Ingredients

  • 1 stick unsalted butter, cut into 1-inch cubes, plus
  • 1 tablespoon, melted
  • 1½ cups all-purpose flour, plus extra for rolling
  • ¼ teaspoon kosher salt
  • 2 tablespoons sugar
  • 3 Granny Smith apples
  • 1 tablespoon fresh lemon juice
  • 1 teaspoon ground cinnamon

Instructions

  1. Set the cubed butter on a plate and place it in the freezer for 15 minutes. Fill a cup with ice and water and set aside. Place 1 1/2 of the flour, 1⁄ 8 teaspoon of the salt, and 1 tablespoon of the sugar in the bowl of a food processor and pulse to combine. Take the butter out of the freezer and add it to the flour. Pulse the mixture until it looks like wet sand, about 10 seconds. Add 2 to 3 tablespoons of the ice water and pulse until the dough comes together into a ball.
  2. Lightly flour your work surface and place the dough on top. Then lightly flour the top of the dough and roll to about a 10- to 11-inch circle, sprinkling more flour under and on top of the dough as necessary. Gently drape the dough over the rolling pin and transfer it to a 9- or 9 1/2-inch fluted tart pan (ideally one with a removable bottom). Fit the dough into the bottom and up the sides of the pan as evenly as possible and press off excess dough from the fluted rim. Set the tart pan on a baking sheet and place in the refrigerator for 15 minutes.
  3. Preheat the oven to 350°F. Peel, core, and quarter the apples and then thinly slice them lengthwise. Place the apples in a large bowl and toss with the lemon juice, the cinnamon, and the remaining 1 tablespoon sugar and 1⁄ 8 teaspoon salt. Remove the baking sheet with the tart shell from the refrigerator. Arrange the apples in concentric circles so they overlap slightly. Brush the edges of the crust with the melted butter and then bake until the edges are golden and the apples have cooked down, about 1 hour. Cool for 15 minutes before slicing and serving.

Vegetarian Lasagna with Spinach & Ricotta

0 comments

Vegetarian-lasagnaPin It
Vegetarian lasagna (aka veggie lasagna) might be a bit of a cliche, but everyone loves it, and it has the great advantages that you can do it ahead for a crowd, and it finishes in the oven, so you can concentrate on your guests.
I make mine without a bechamel sauce, opting for a spinach and ricotta mixture to provide the creaminess. I also prefer it to set up to a fairly firm, sliceable “pie”, but if you like a wetter version, you could do the sauce 1.5 x or even double. The keys to a great veggie lasagna are (1) get all the liquid out of the veggies, (2) get the cheese on top really crispy. You don’t want to go too heavy on the vegetables, otherwise you can get a lot of weeping and/or unpleasant crunchiness.
I make this with no-boil lasagna noodles. They are pretty much just standard noodles except rolled thinner, so that they simply cook in the sauce while the lasagna bakes. They need more sauce to ensure proper moistening. If you want to use regular noodles, just boil them first according to package directions and simmer the tomato sauce a bit more to thicken it (or use less of it).
45

Recipe: Vegetarian Lasagna Recipe with Spinach and Ricotta Filling

  • Prep Time: 30 min(s)
  •  
  • Cook Time: 60 min(s)
  •  
  • Total Time: 1 hour and 30 min(s)
  •  
  • Servings: 8
Please your family or party guests with this lovely veggie lasagna recipe.

Ingredients

  • 1 plastic produce bag stuffed tightly full of spinach (preferably not baby spinach)
  • 1 pound ricotta
  • 1/2 teaspoon grated nutmeg
  • Kosher salt
  • Freshly ground black pepper
  • 2 eggs, lightly beaten
  • 1/4 cup extra-virgin olive oil
  • 1 onion, diced
  • 2 cloves garlic, minced
  • 1/2 head cauliflower florets and some stem, cut into small bite-sized pieces
  • 2 large (28 oz.) cans plain tomato sauce
  • Zest from 1 lemon
  • 1 1/2 pounds no-boil lasagna noodles (or regular lasagna noodles, par-boiled)
  • 1 pound grated mozzarella cheese
  • 4 ounces grated Parmesan cheese

Instructions

    • Clean the spinach well. Place in a microwave safe bowl, cover loosely with a plate and microwave until fully wilted, about 5 minutes. Allow to cool, then squeeze out all water. (A good way to do this is by wrapping in a clean dish towel and twisting.) In a medium bowl, stir together the spinach, ricotta and nutmeg. Add salt and pepper to taste, then stir in the eggs.
    • Put the olive oil in a large skillet over medium high heat. Add the onion and garlic and 1/2 teaspoon salt, and cook, stirring occasionally until translucent (about 2 minutes), then add the cauliflower and cook, stirring occasionally, for 5 more minutes. Add the tomato sauce and lemon zest, lower the heat to a simmer and cook for 5 more minutes. Taste and adjust salt.
    • Preheat the oven to 375. Oil an lasagna pan (at least 2″ deep). Build up layers of noodles, sauce, ricotta mixture, and mozzarella. Be sure to get the noodles quite wet since they are the no-boil type and need plenty of moisture. You’ll have about 4 layers total. I do sauce on every layer, but ricotta on some and mozzarella on others.
    • Finish with a heavy layer of mozzarella and the parm, mixed together.
    • Bake , covering with tin foil part of the time if needed to avoid overbrowning. It is done when internal temp is say 170 F. (check a few spots) or when you can easily pierce the noodles with a fork, and the sauce is bubbling around the sides.
    • If the cheese isn’t crispy and brown enough, finish judiciously with the broiler.
    • Allow to rest at least 15 minutes before serving so it has time to set up a bit.

Pumpkin Chocolate Chip Corn Muffins

0 comments

Pin ItMy 15-year-old son, Solomon, is a pretty even-keeled guy, but the other day he came home from school looking so downtrodden. He was feeling annoyed at a teacher and was frustrated that he had worked so hard to train for a cross country meet but wasn’t able to run because of a minor injury. By some karmic coincidence, I happened to be making his favorite muffins, Pumpkin Chocolate Chip Corn Muffins, and was just taking them out of the oven as he walked in the door with his head hanging low. At least something went right for him that day!
Solomon gets so happy when I make these wholesome muffins, adapted from a recipe in Real Simple magazine and suggested by our friend Jody Gan. When I haven’t made them in a while, he subtly reminds me how much he loves them. Solomon enjoys having one for two for breakfast and another one after school for a snack. I feel good when he eats them because these muffins are full of healthy ingredients like whole grains, pumpkin, spices and dark chocolate. Make sure not to over-mix or overcook them, so they don’t become dry.
Pin It
Beat the butter and sugar til light and fluffy, and then add the eggs.
Add the remaining ingredients.
Add the pumpkin.
Fold the chocolate chips into the batter.
47

Recipe: Pumpkin Chocolate Chip Cornmeal Muffins

  • Prep Time: 10 min(s)
  •  
  • Cook Time: 20 min(s)
  •  
  • Total Time: 30 min(s)
  •  
  • Servings: 24

Ingredients

  • 1/2 cup unsalted butter, softened
  • 3/4 cup brown sugar
  • 1/2 cup nonfat or low-fat milk
  • 4 eggs
  • 15 oz. canned pumpkin
  • 1 1/2 cups whole wheat flour
  • 1 cup yellow cornmeal
  • 2 tsp. baking powder
  • 1 tsp. baking soda
  • 1 tsp. cinnamon
  • 1/2 tsp. salt
  • 1/4 tsp. ground cloves
  • 1 cup semi-sweet chocolate chips

Instructions

    • Preheat the oven to 350 degrees. Coat two muffin tins with nonstick cooking spray.
    • In an electric mixer, beat the butter and sugar until it is light and fluffy. Add the remaining ingredients EXCEPT the chocolate chips and beat just until smooth. Fold in the chocolate chips.
    • Fill the muffin tins about 2/3 full with the batter, and bake for 20 minutes, or until a toothpick inserted in the center of a muffin comes out clean (a little under-baked is good).
    • Let cool and serve immediately, or store tightly covered for up to 3 days, or freeze for up to 6 months.

Dark Cocoa Molasses Cookies

0 comments
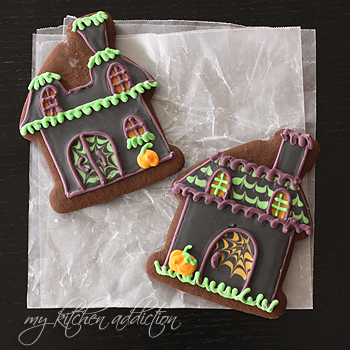
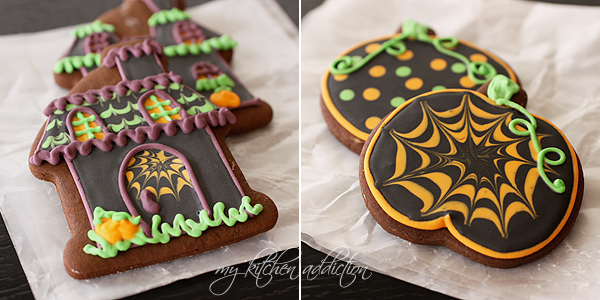
I love to decorate cookies… And, typically my cookie of choice is a standard vanilla bean sugar cookie. My sugar cookies are both tasty and sturdy, two important qualities in a cookie!
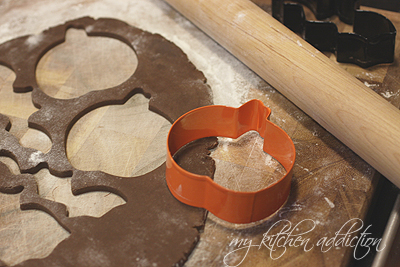
This time of year, though, I start to get antsy and feel the need to break out of the usual sugar cookie mold. Instead, I start to dream of spices and molasses. I have a thing for dark molasses. I could drink it straight from the jar. I don’t, but I could. So, when I decided to make some Halloween cookies last week (since I hadn’t really done anything festive up to that point), I decided to play around with some molasses.
Instead of just making my usual gingerbread cookies (which are another tasty and sturdy favorite for decorating… especially around the holidays!), I decided to go a slightly different route. With gingerbread as my guide, I decided to add some dark cocoa into the mix. I have seen chocolate gingerbread cakes before, so I figured I could make it work for cookies. And, it did.
These cookies are slightly chewy but still quite sturdy, much like the texture of my gingerbread cookies. And, they aren’t too sweet. You can taste both the dark cocoa and the dark molasses in the cookies. Plus, I threw in some cinnamon for a bit of spice. Everything this time of year can use a little cinnamon, right?
Overall, I was pleased with how the cookies turned out, and I loved the dark color for Halloween cookies. I think they’d be a fun substitute for traditional gingerbread if you want to mix things up a bit for Christmas. While I haven’t given up on my always popular vanilla bean and gingerbread cookies, you can be sure there will be some more dark cocoa molasses cookies making an appearance in my kitchen this year.
Dark Cocoa Molasses Cookies
(
Makes about 2 1/2 dozen 3-inch cookies, adapted from the King Arthur Flour Cookie Companion)
  • 3/4 cup (1 1/2 sticks) unsalted butter, softened
  • 3/4 cup lightly packed dark brown sugar
  • 3/4 cup dark molasses
  • 1 egg
  • 4 cups all purpose flour
  • 1/2 cup dark cocoa powder
  • 1 1/2 teaspoons ground cinnamon
  • 1 teaspoon baking powder
  • 1 teaspoon salt
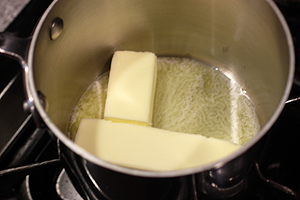
Melt the butter in a saucepan over medium-low heat.  Add the brown sugar and continue to cook for a few minutes to dissolve and melt the sugar. Remove from the heat and stir in the molasses.  Transfer the mixture to a large mixing bowl and let cool to lukewarm/room temperature.  Once the mixture has cooled, beat in the egg.
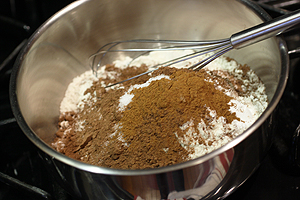
Meanwhile, whisk the flour, cocoa powder, cinnamon, baking powder, and salt in a separate bowl. Gradually add the flour mixture to the mixing bowl, beating on low speed until just combined.  Divide the dough into four equal parts, shape each one into a disc and wrap with plastic wrap. Transfer to the freezer for about 30 minutes, until the dough is cool to the touch.
Preheat the oven to 375°F. Line a baking sheet with parchment paper or a silicon liner. Set aside.
Roll each disc of dough out on a lightly floured surface to approximately 1/4-inch thickness. Use cookie cutters to cut shapes from the dough and transfer them to the baking sheet. Bake for approximately 10 – 12 minutes.  Cool on the pan for a few minutes, then transfer to a wire rack to cool completely before decorating.
- See more at: http://www.mykitchenaddiction.com/2011/10/dark-cocoa-molasses-cookies/#sthash.BWV5oDPh.dpuf

Buckwheat Buttermilk Pancakes

0 comments

Pin It
Buckwheat pancakes have a place in the American imagination, but rarely at the breakfast table. When you do occasionally find them at restaurants, the percentage of buckwheat flour is so low that you can hardly taste it. Which is a shame, because the warm, toasty, nutty flavor is delicious.
You can easily substitute up to 50% buckwheat flour in any pancake recipe and it will be fine but possibly a little flat. I counteract that tendency with buttermilk, which adds a lot of leavening power. Pancake batter should be fairly thick so that it has time to rise instead of spread when poured on the griddle.
Pancakes are a great way to introduce children to cooking because the mixing is fun, they are ready to eat in minutes, and most kids love them. Making them from scratch teaches your munchkins the value of home-cooked instead of pre-packaged foods, and it gives you the opportunity to make them from healthier ingredients. When we don’t make buckwheat, we’ll use a mixture of half whole-wheat pastry flour and half unbleached white flour, which is also delicious.
17

Recipe: Buckwheat Buttermilk Pancakes

  • Prep Time: 10 min(s)
  •  
  • Cook Time: 10 min(s)
  •  
  • Total Time: 20 min(s)
  •  
  • Servings: 12
Enjoy these hearty pancakes featuring the toasty, nutty buckwheat flavor.

Ingredients

  • 3/4 cup buckwheat flour
  • 3/4 cup unbleached white all-purpose flour
  • 3 tablespoons sugar
  • 1 1/2 teaspoons baking powder
  • 1/2 teaspoon baking soda
  • 1/2 teaspoon salt
  • 1 1/2 cups buttermilk
  • 3 tablespoons unsalted butter, melted
  • 2 eggs

Instructions

    • Whisk together the buckwheat flour, white flour, sugar, baking soda, baking powder, and salt in one bowl.
    • Whisk together the buttermilk, butter and eggs in a second bowl. You can save a bit of cleanup by melting the butter in this bowl in the microwave, then stirring in the buttermilk and eggs.
    • Stir the wet ingredients into the dry. Be sure not to overmix, or your pancakes will come out tough. It is ok if they have some lumps. If it is too thick, add a bit more buttermilk or milk, but keep it on the thick side. If it is too thin, add a bit more of either flour.
    • Heat a griddle over a medium high flame. Rub it with a bit of oil on a paper towel. Ladle out pancake batter to about 5" circles. Allow to cook until bubbles form on top and peek underneath reveals a nice dark brown. Flip and cook until the other side is done.
    • Serve forth with plenty of soft butter and real maple syrup.